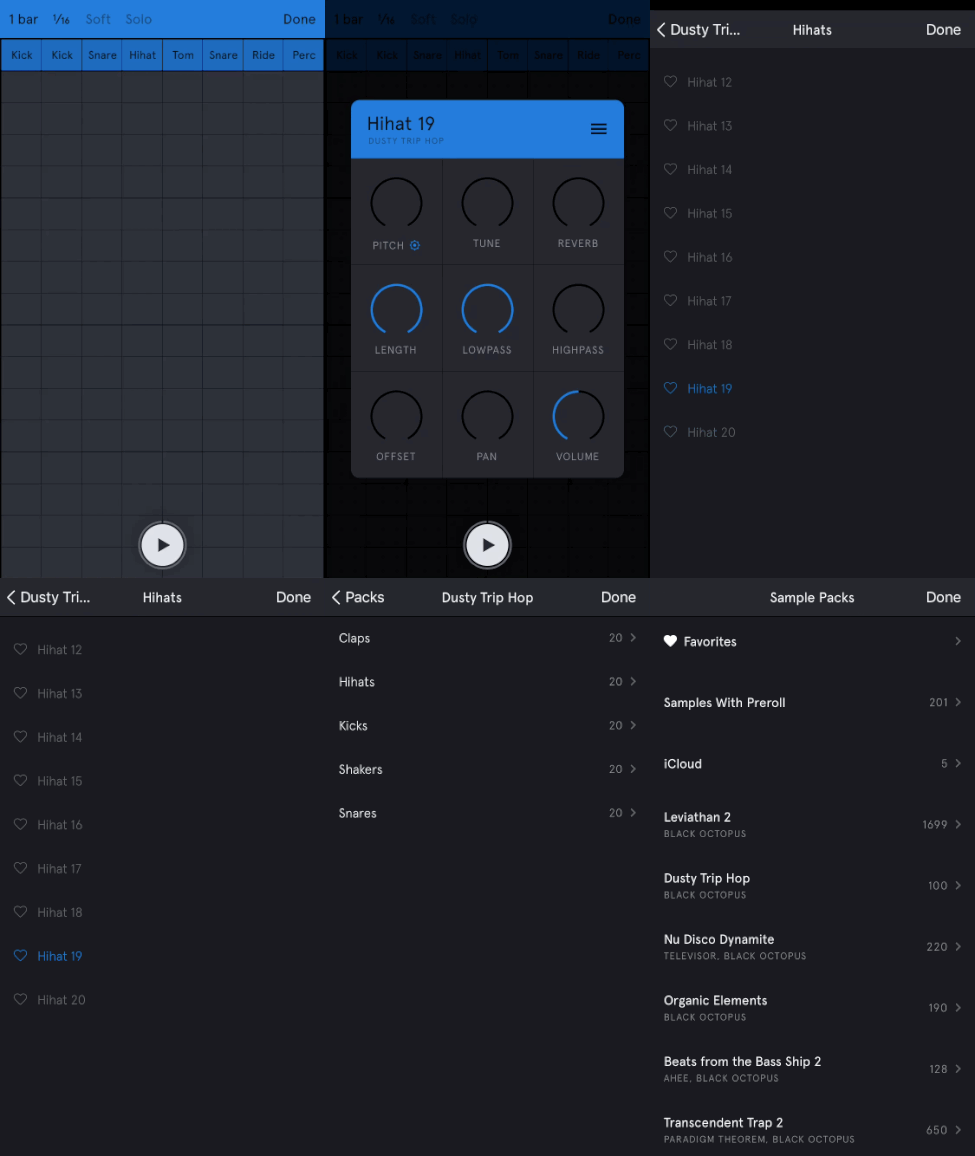
Open the drum editor and tap one of the sample slots above the grid. If the slot is empty, the browser will open right away. If there is a sample loaded in the slot, you will see the tweak options, and from there you can tap the title to open the browser.
To import your own samples you need to have an active subscription and enable iCloud. To enable iCloud, goto your project list and tap "Enable iCloud" if the button is visible. Also check your iCloud settings in the Settings app to make sure that iCloud is enabled for Auxy.
In the app that you use to record or generate an audio file, use the “open in” or “copy to” actions and select either Auxy or the Files app as the target. If you select Auxy as the target, it will add the file to the Samples folder automatically. If you select Files, you have to locate the Auxy/Samples folder and put the file there.
If you’re using a Mac, you can copy WAV files directly to the Auxy/Samples folder using iCloud Drive.
In the sample browser there is a pack called "iCloud" that will list any WAV files that you copy to the iCloud folder 'Auxy/Samples'.
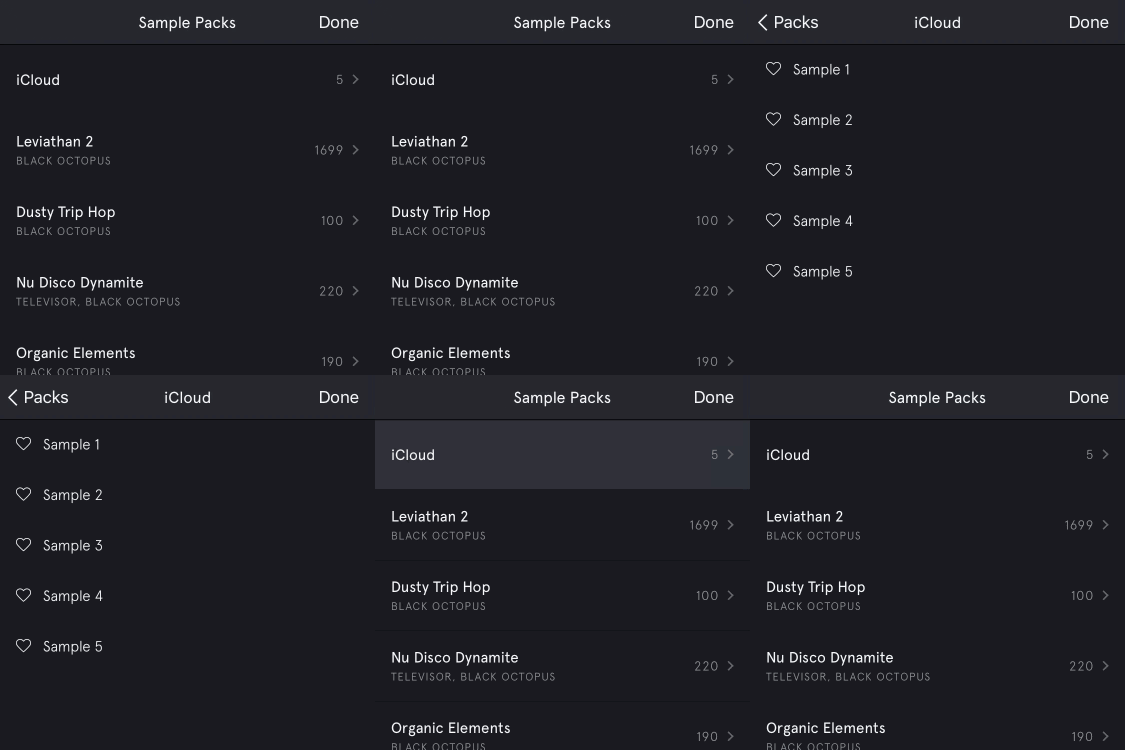
Your samples have to be uncompressed WAV files. The max length is 10 seconds, regardless of the sample and bit rate. Note that some audio recorders and messaging apps will automatically compress WAV files to AAC or MP3, and those files cannot be imported.
You can record your own samples on your iOS device using a third-party app and then import them to Auxy. There are many recording apps available in the App Store.
You can arrange your samples into sub folders, which allows you to sort them into different groups and sub categories. For example, putting a sample in “Auxy/Samples/HipHop/Kicks” will show the sample in the group “HipHop” and sub category “Kick”.
Note that adding multiple folder levels will not generate any additional sorting, i.e. “Auxy/Samples/HipHop/Kicks” will generate the same sorting as “Auxy/Samples/HipHop/808/Kicks”
When you share a project that uses imported samples, the samples will not be included in the project file. Each drum kits will have references to each sample but you have to share all the imported samples separately and make sure that the person who open the project have them in his/her Samples folder. If the included samples are not added with the same name and folder structure, you will have an option to relocate the samples manually.
To arrange your loops into tracks, tap the scene button in the bottom toolbar to bring up the scene view. Here you can create scenes and then decide which loops you want to have playing in each scene. You can set the length of each scene and toggle scene looping on/off.
Automation refers to automating sound tweaks over time to create movement and set the right mix for different parts of a track. A simple example is automating the volume to fade in an instrument, but that’s just scratching the surface of what you can do.
To automate the sound settings for an instrument you add automation loops below the melody loops. The automation loops work similar to the melody loops. You can set the length of each loop and have one automation loop active in each scene.
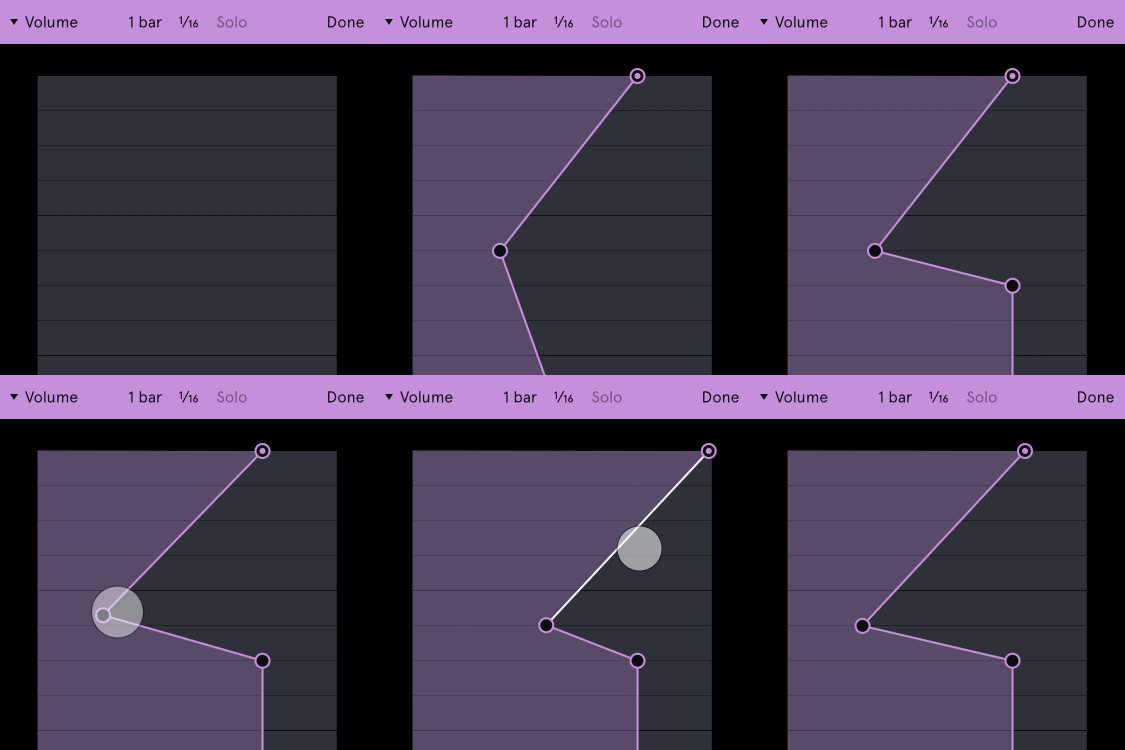
When you edit an automation loop you can select which tweak setting you want to automate in the top left corner. Then tap the grid to add nodes and draw the automation curve. You can drag nodes around, or drag the curve to move a segment between two nodes. You can select and edit multiple nodes by long-pressing the grid.
In automation loops, each parameter can have its own length setting. This means you can make an automation loop that e.g. repeats a filter automation every bar and does a volume fade in over four bars.
If you want a specific tweak setting in a scene, you have to use an automation loop and set a ‘static’ value, i.e. straight automation curves. The easiest way to set static values is to tap the grid once to add a straight line, and then drag the curve left or right.
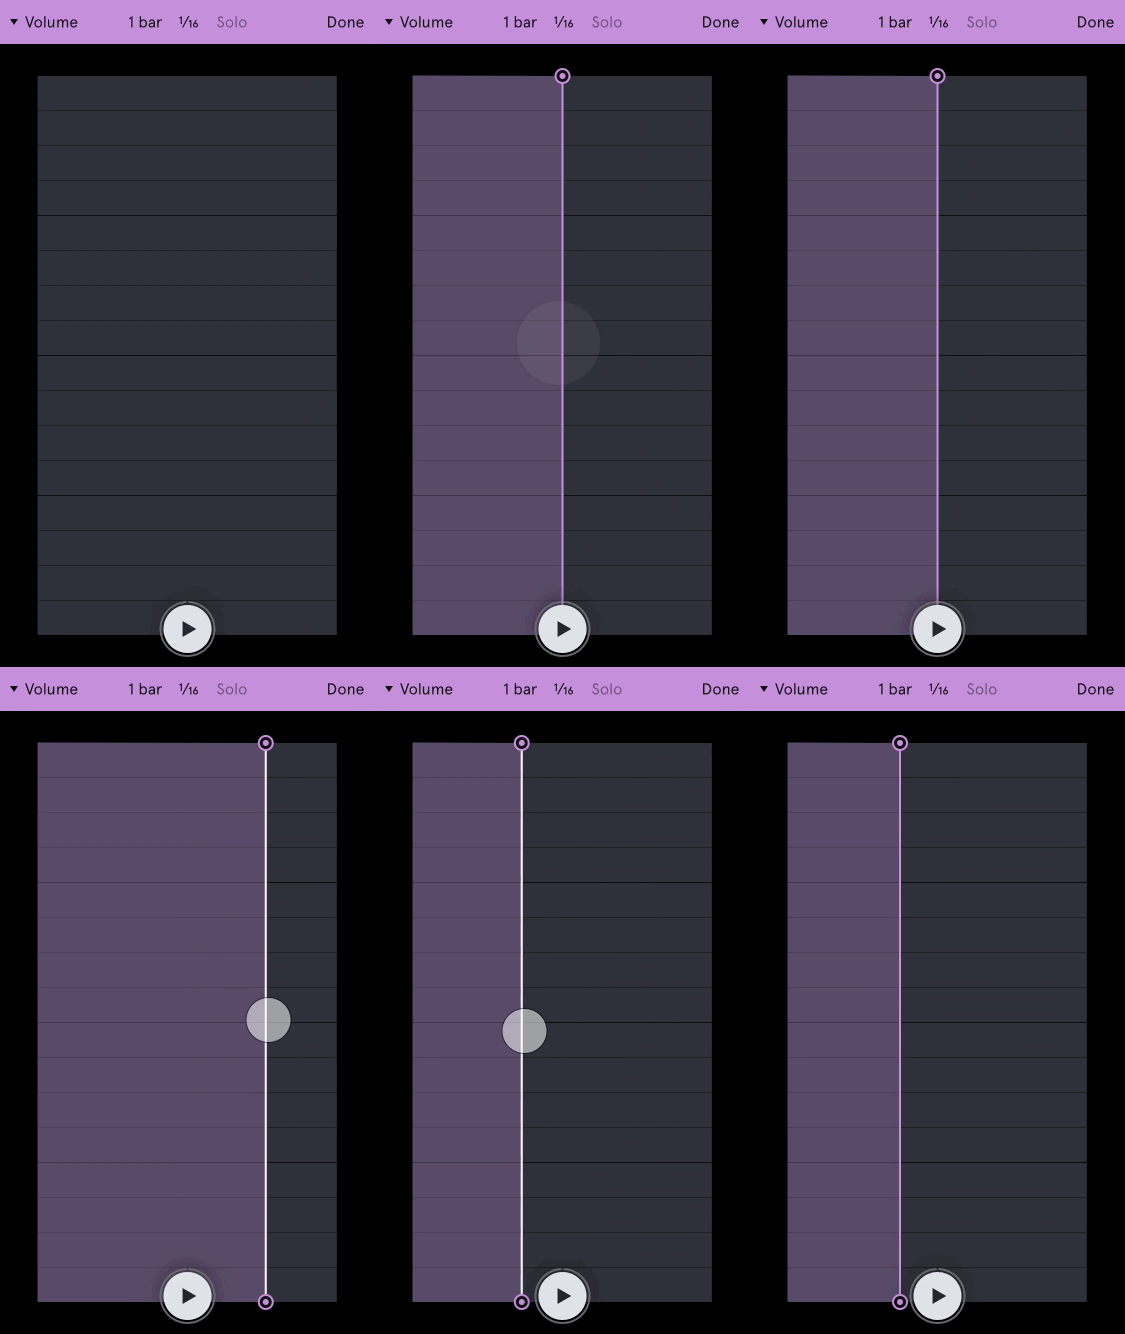
If you remove the start- and end nodes (marked with a dot inside the circle), the curve will automatically snap to the values of the previous and next scenes. This is useful for creating smooth transitions between scenes.
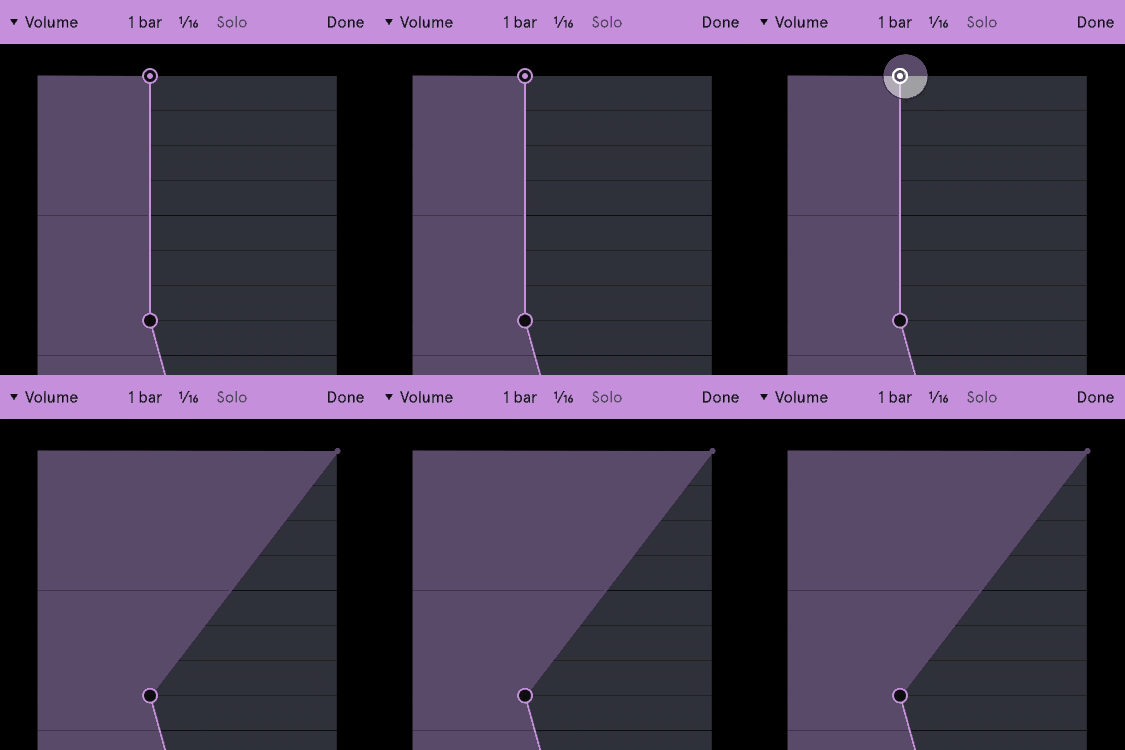
In addition to the options available in the tweak panel, you automate the pitch of each instrument plus/minus one octave. Nodes will automatically snap to even semitones.
Open the settings (top right corner) and tap "Export" to see the different export options. Tap "Render" Project to run through the currently opened project and create an audio file that you can export. All your rendered audio files from all your projects will appear in the same list. Note that renders are stored on your device but not in iCloud. Audio files can take up a lot of space on your device, so if you need to free up space you can swipe left to delete renders.
Select the render that you want to export and pick one of the following options:
Projects can be backed up and synced with iCloud. If you enable iCloud on all your devices, you can create a project on your iPhone and access that same project on your iPad. In addition, there’s a backup folder that automatically saves old versions of your projects.
You can access all your projects via the Files app in iOS or the Finder on your Mac.
If you need to restore a lost project or undo some big changes, tap “Backups” above the project list and locate the project you want to restore. Restoring a project will add a copy of that project to your main list, so you don’t have to worry about losing the most current version of the project.
Note that iCloud is free with basic storage. Auxy projects take up very little space, so we recommend that everyone enables iCloud in order to keep projects backed up. Also note that track renders are not stored in iCloud in order to save space.
When you create and edit loops, the grid will only show notes in the currently selected key and scale. You can set the key and scale in the project settings. If you set the key to “C” and scale to “Major”, the grid will only show the notes in the “C Major” scale (C, D, E, F, G, A, B).
The grid is labeled with numbers 1, 3, 5, highlighting the 1st, 3rd and 5th notes in the scale. In “C Major”, 1, 3, 5 highlights C, E, G, which are the notes used in a C Major chord.
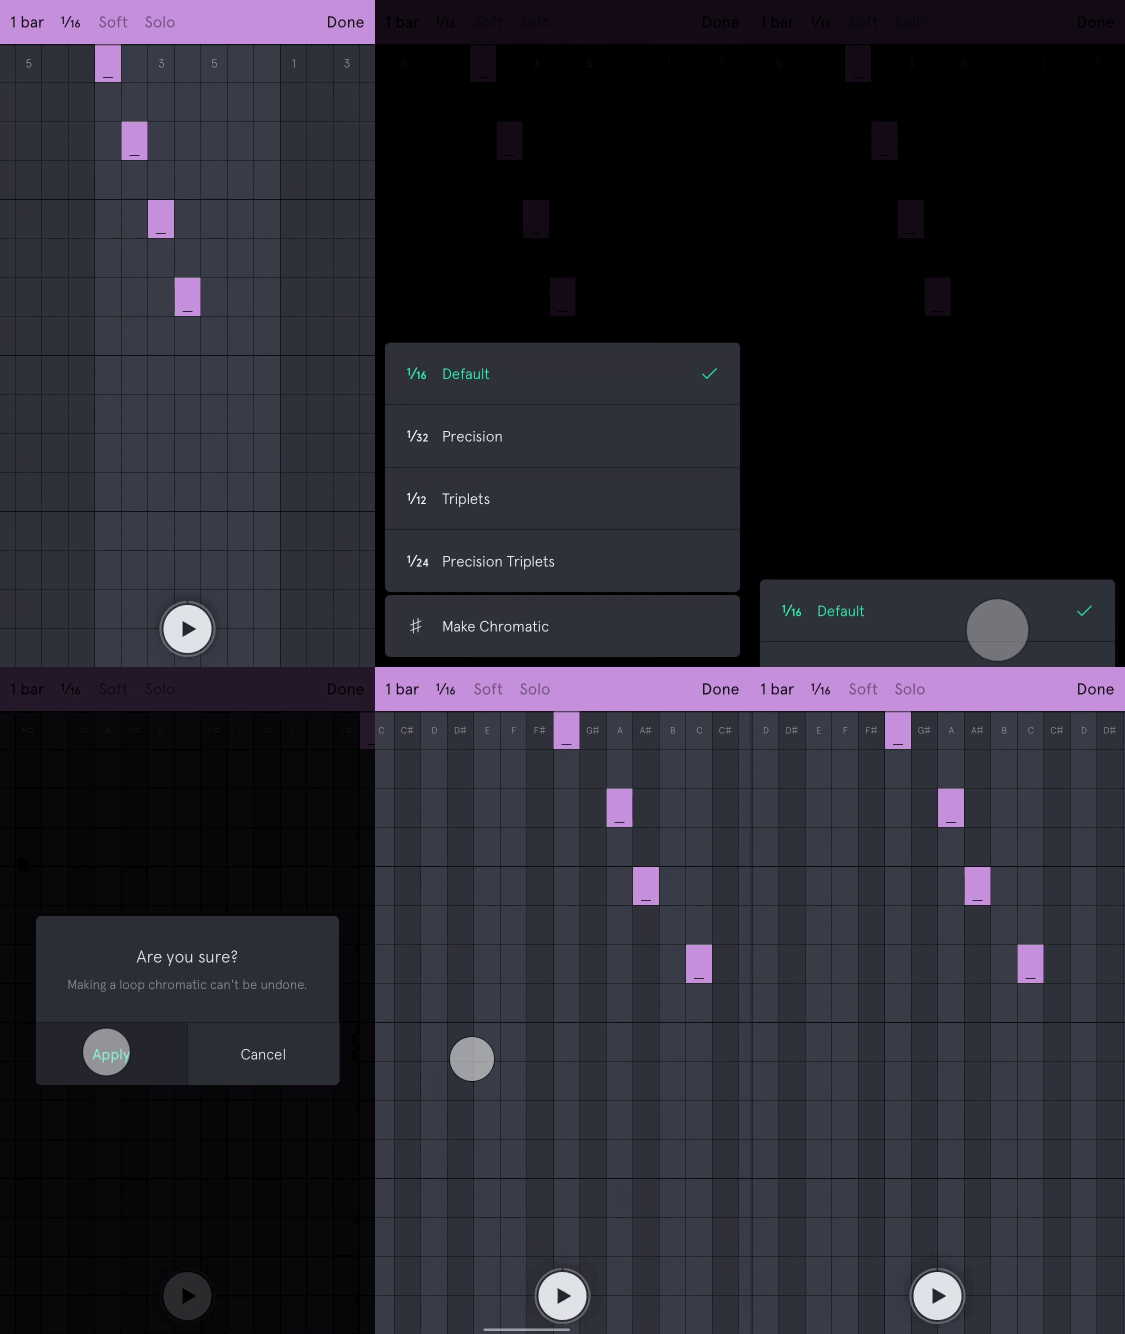
In case you want to add notes that are not in the currently selected scale, you can make any loop chromatic via the grid settings menu. You can also choose to make all new loops chromatic by default in the scale settings.
If you want to learn more about music theory, there are tons of good videos on YouTube and other resources to tap into. Some recommendations are posted in this thread on Reddit.
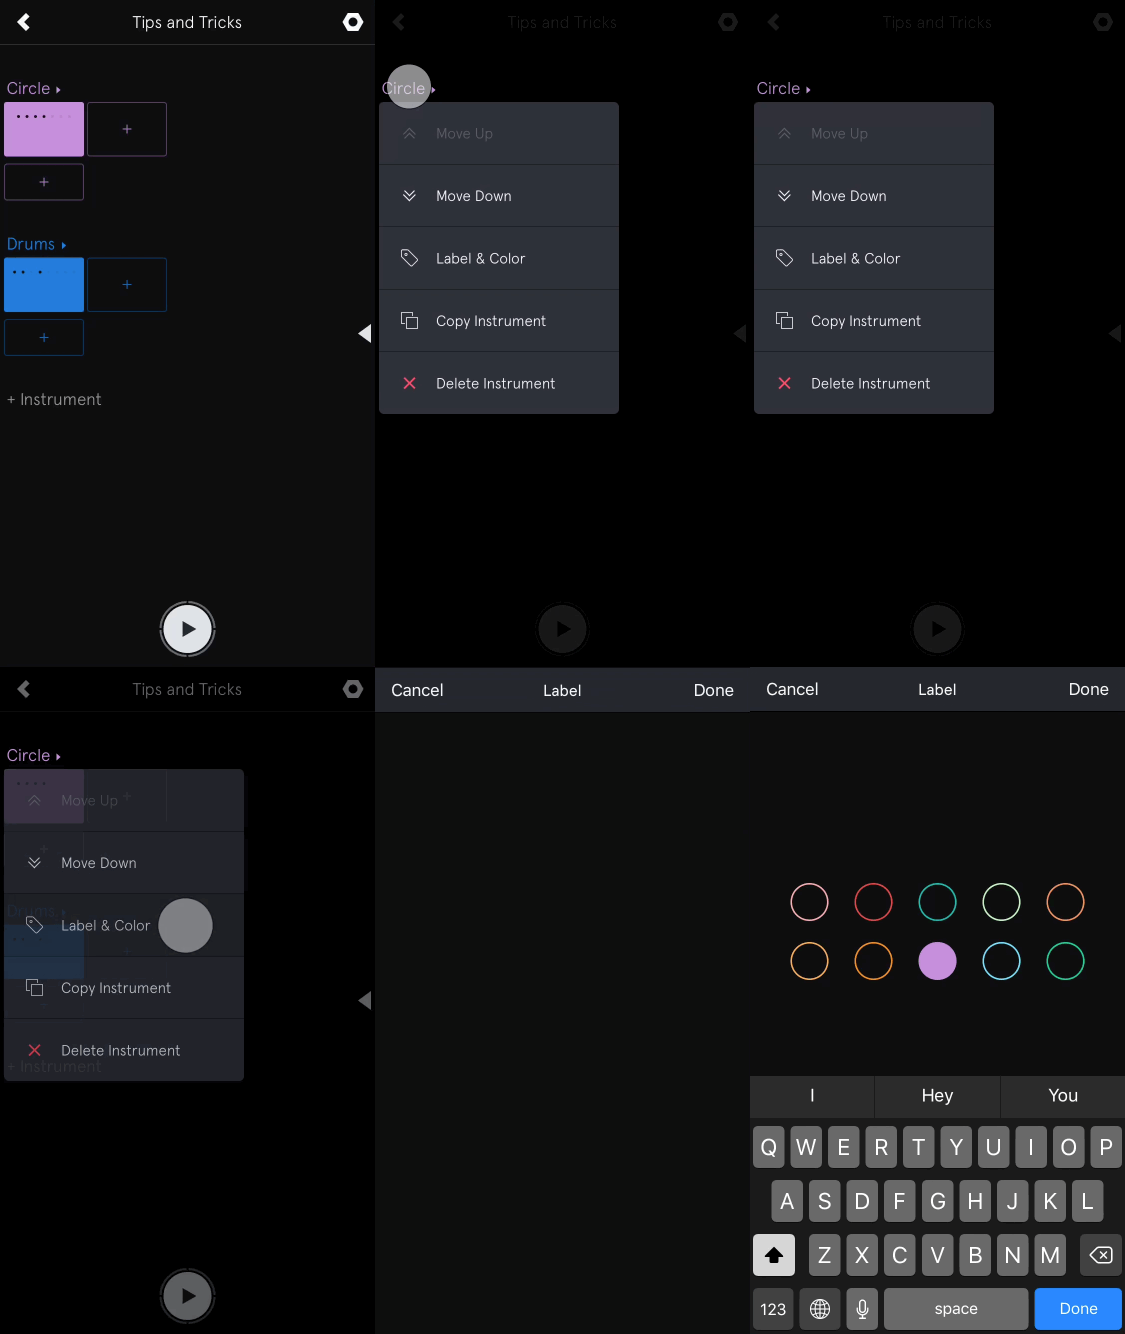
Touch and hold the instrument title until you see a menu with options to move, copy, or delete the instrument. You can also edit title and color for each instrument. Note that it’s not possible to change the color of drum tracks.
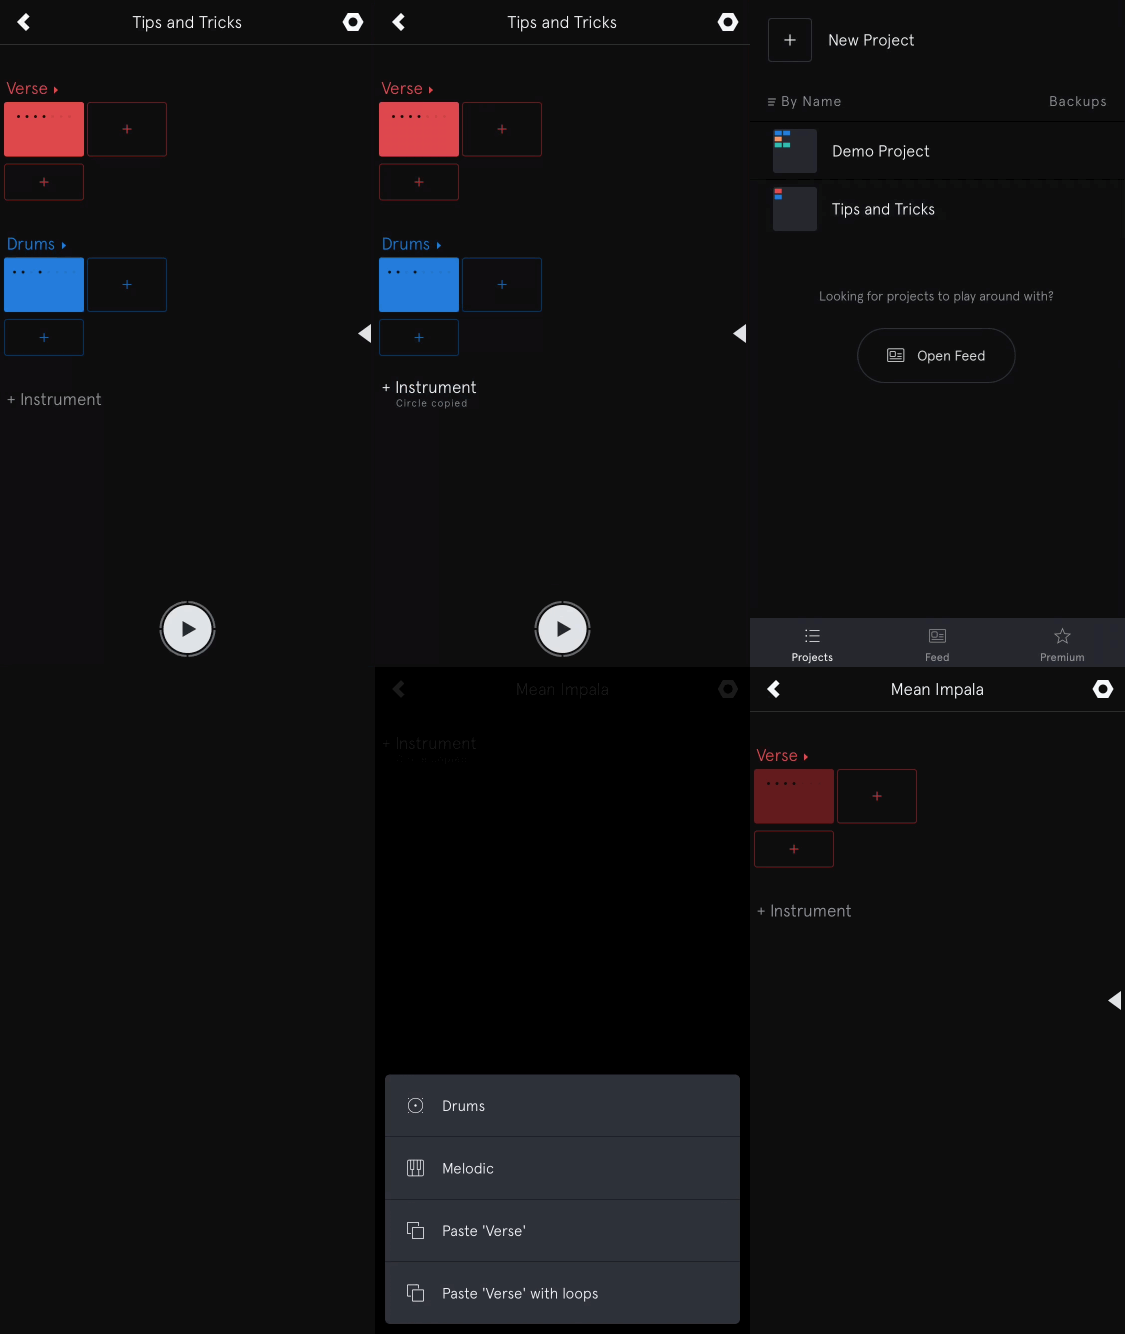
Copy an instrument by touching and holding the title and selecting “Copy Instrument”. Then you can open a different project and paste the instrument along with its loops.
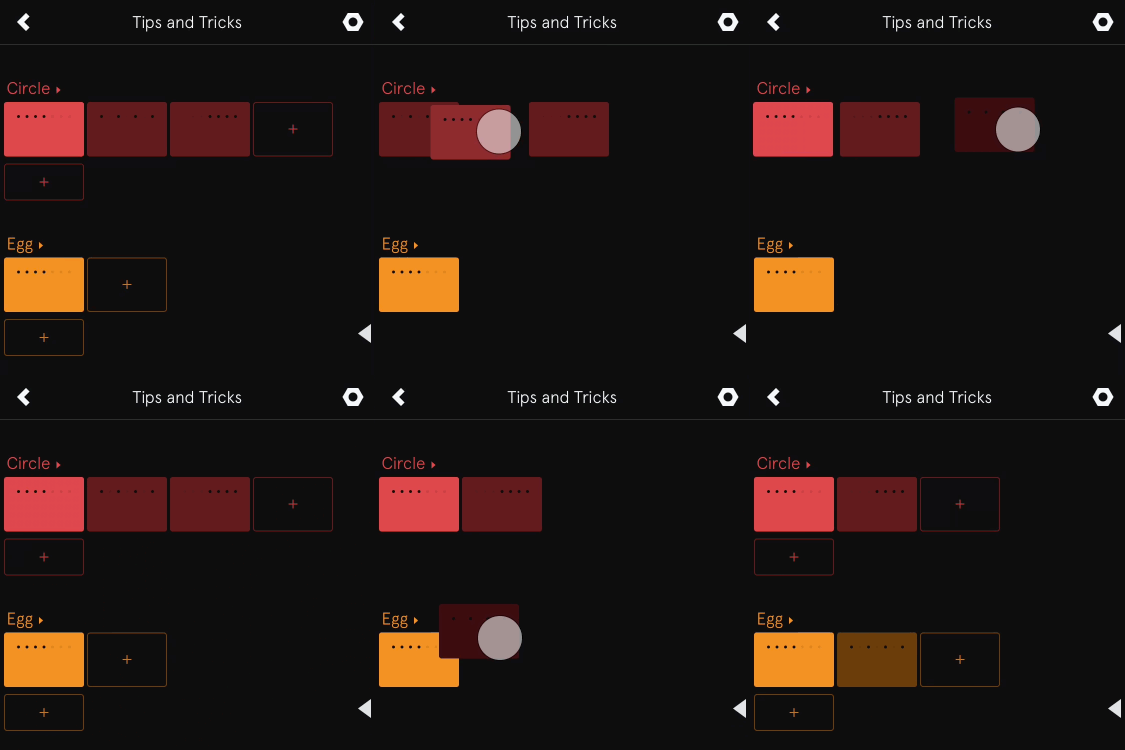
You can drag sideways to quickly move loops and scenes without having to touch and hold until you see the “Move” option. Loops can be dragged between different instruments, but you cannot drag a drum loop to a melody instrument and vice versa.
If you have a device that supports 3D Touch, you can press hard on a loop to jump straight into edit without using the menu.
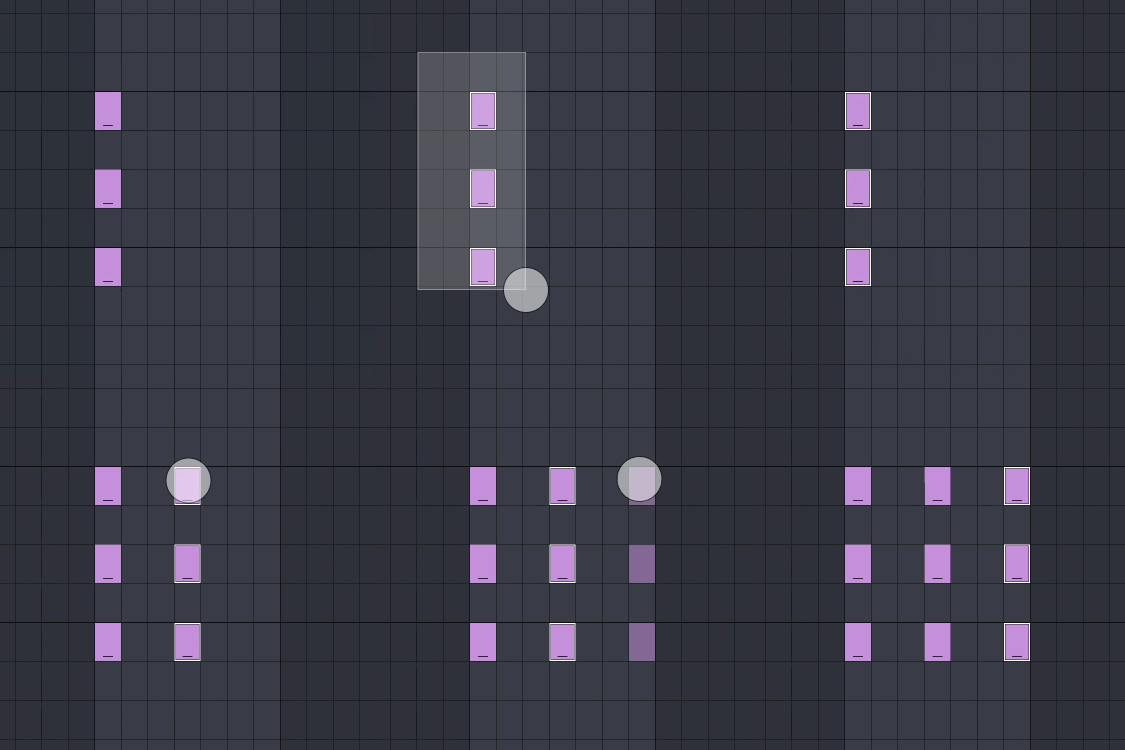
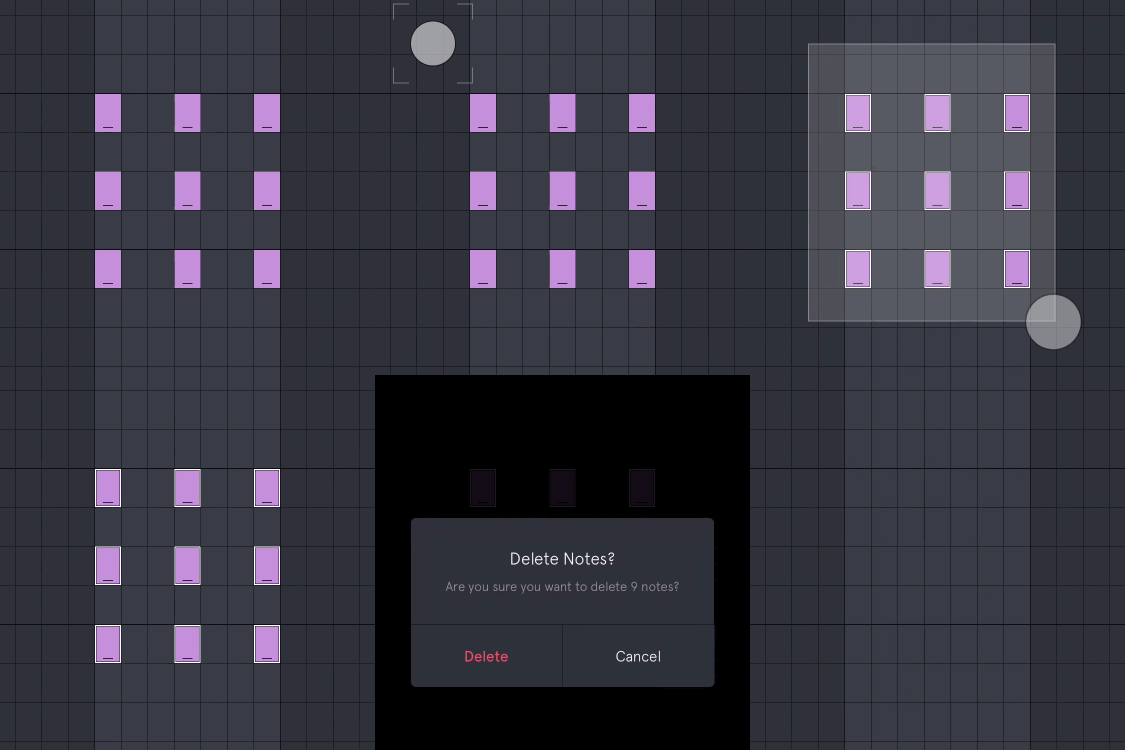
When you edit notes, touch and hold the grid until the selection box appears, then drag to select multiple notes. With multiple notes selected, you can move, delete, or extend all notes at once. You can also duplicate the selected notes by touching and holding an empty spot on the grid.
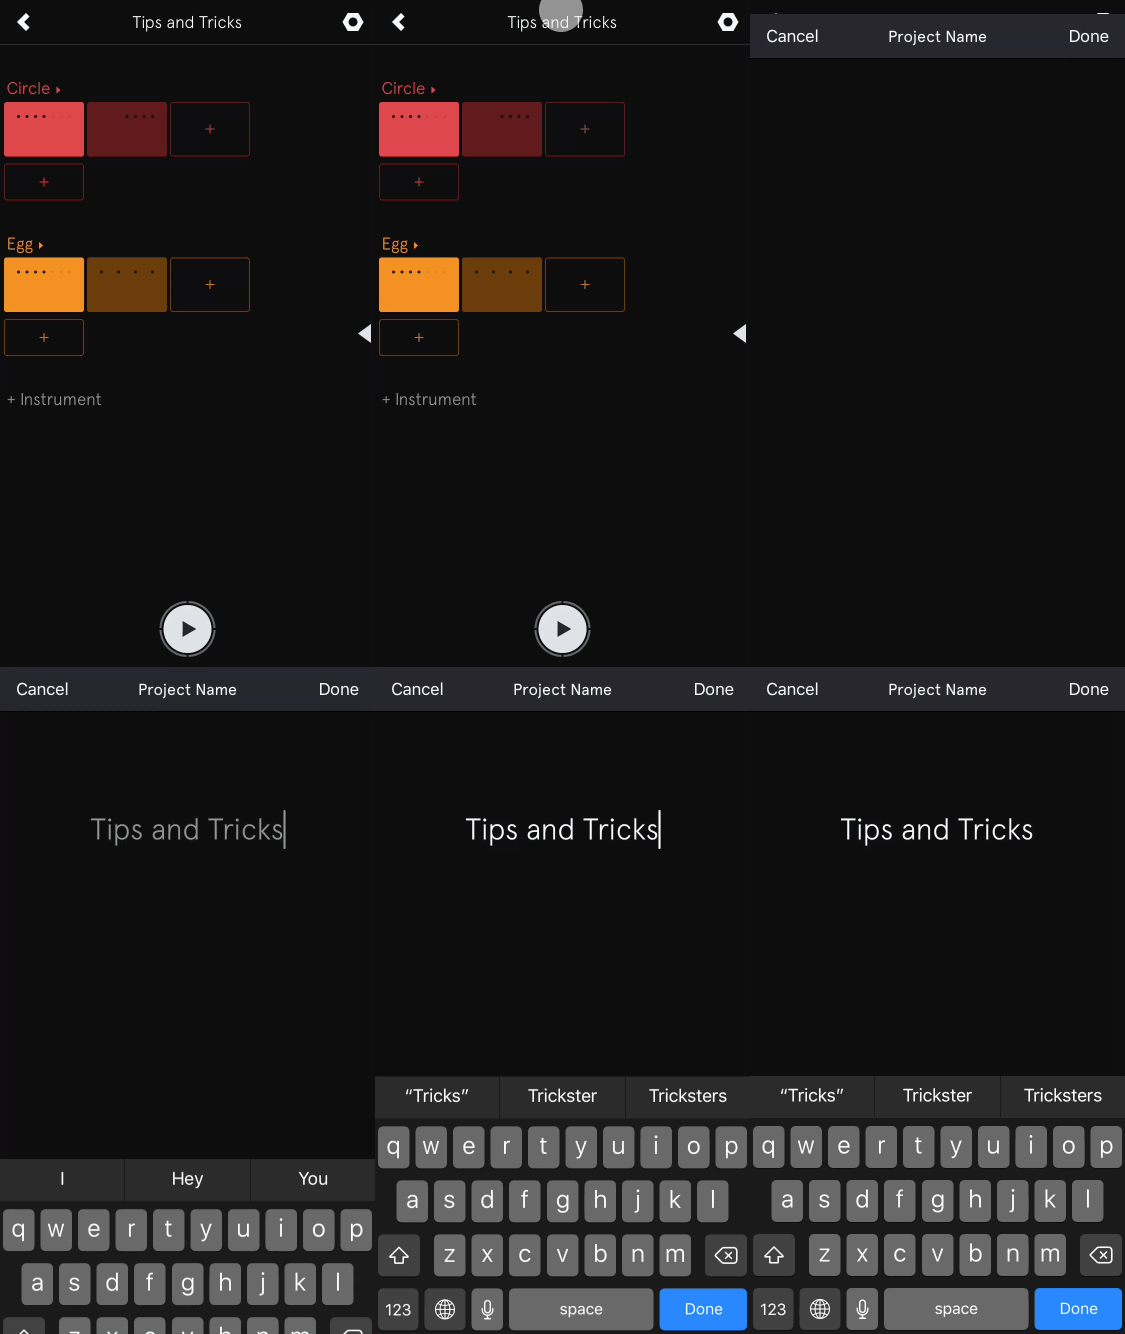
When you create a new project, it automatically gets a random name like “Sassy Panda”. You can tap the project title to rename your project, and set your creator name in the project settings.
Tap the tempo slider to the left or right of the handle to adjust the tempo one step at a time. This also works for the Swing and Key sliders.